Category Archives: Tengu Fit

Tengu Fit: Exploration Travel

I have received a couple of emails and comments recently asking about my fit for scanning and travelling through lowsec before switching to some of my posted fits for lowsec exploration complexes.

I don’t have one “travel fit” that I use exclusively, it kind of depends on the space I am in, and what I plan on doing.  Occasionally, I travel in a PVP fit for snagging unobservant frigates in data or relic sites.  But most of the time, I use a fit that is focused on exploration efficiency.

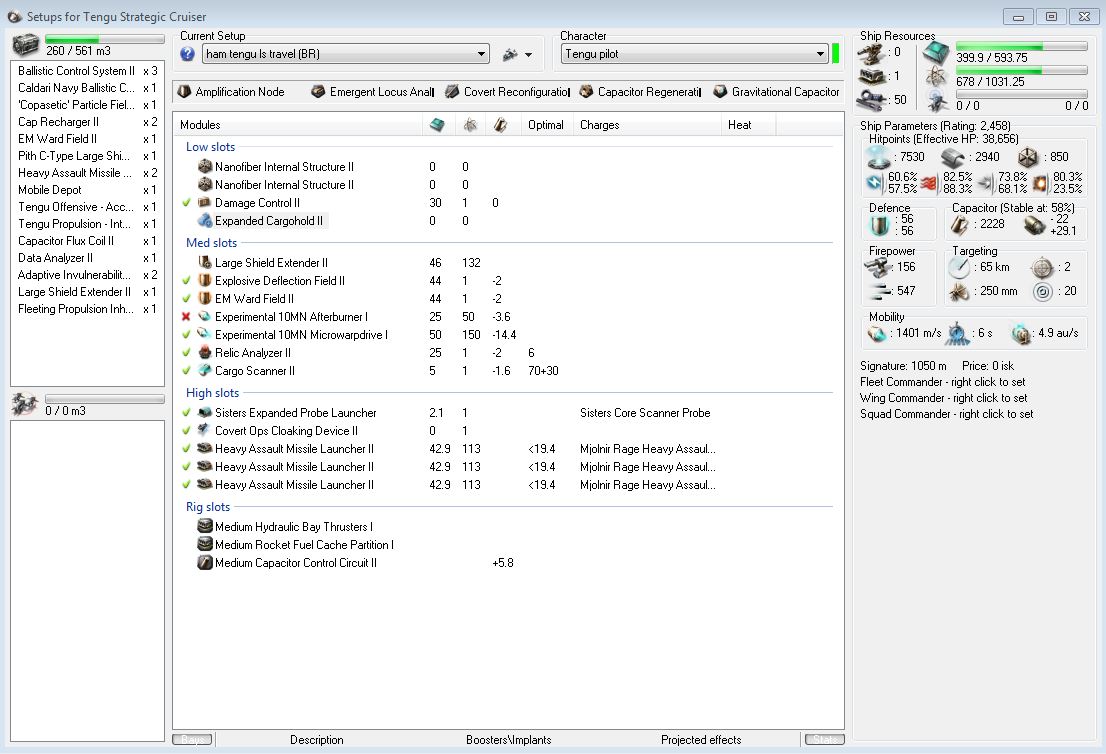
Since I am currently in Blood Raider space again I will show my entry level BR fit.  Items in RED are just for travel.  The other items get re-used in combat complexes.

[Tengu, ham tengu ls travel (BR) ]
Nanofiber Internal Structure II
Expanded Cargohold II
Damage Control II
Nanofiber Internal Structure II

Relic Analyzer II
Experimental 10MN Microwarpdrive I
Explosive Deflection Field II
EM Ward Field II
Experimental 10MN Afterburner I
Large Shield Extender II
Cargo Scanner II

Sisters Expanded Probe Launcher, Sisters Core Scanner Probe
Covert Ops Cloaking Device II
Heavy Assault Missile Launcher II, Mjolnir Rage Heavy Assault Missile

Medium Hydraulic Bay Thrusters I
Medium Rocket Fuel Cache Partition I
Medium Capacitor Control Circuit II

Tengu Defensive – Amplification Node
Tengu Electronics – Emergent Locus Analyzer
Tengu Offensive – Covert Reconfiguration
Tengu Engineering – Capacitor Regeneration Matrix
Tengu Propulsion – Gravitational Capacitor


In this fit, it is really all about the mid-slots.  I pretty much always dual-prop my travel fits.  I used to dual-prop with a 100MN afterburner, and that is still a pretty good idea for Null-sec, but I have gotten lazy about this.  I haven’t seen a gate camp for several weeks and I haven’t seen a GOOD one for several months so even if the 100MN afterburner would help me escape, I would probably screw it up for lack of experience.

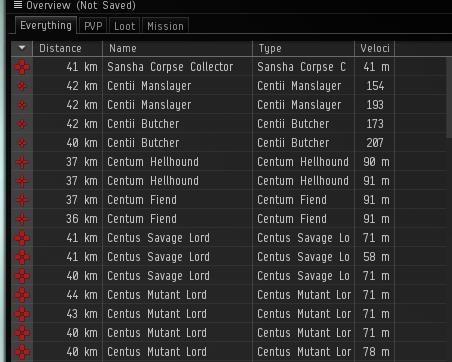
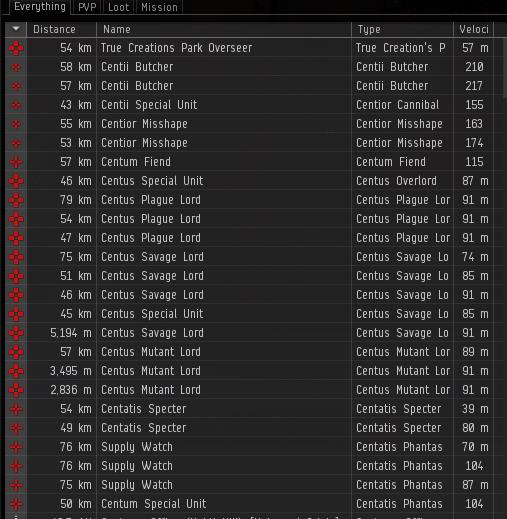
After a dual prop, every thing else in the mids is for being able to clear a Ghost Site without refitting.  Ghost Sites deal explosive damage when the cans pop so an explosive hardener and LSE are very important.  The rats at Ghost Sites deal damage according to the space they are in so having an EM hardener is required.  Even if they didn’t, you have a gaping EM hole and keeping it plugged is a good idea.  Finally, having a cargo scanner and relic (or data) analyzer is required for scanning and getting the Ghost Site loot.

I use a relic analyzer because in lowsec I am (slightly) more likely to run relic sites than I am data sites.  I will sometimes scan data sites, but I won’t run them unless I see a good BPC that is worth refitting for.

In the high slots, I have my probe and cloak.  The missile launchers give you some dps, but it is really more about storage than anything.

The low slots are open to individual preference.  I like a DC, and having an expanded cargohold helps me carry enough missiles to run several sites without restocking.  The NIS’s bring your align time down and help with navigating the debris of relic sites.  I used to use WCS’s, but I hated what they did to my targeting range.  I eventually dropped them entirely.

This is what the fit looks like in EFT along with storing the modules needed for running combat sites.  If I have no other modules or loot, I have enough space for about 300m3 of missiles (I usually carry a medium secure container so that adds a spare 90m3 of space).

Tengu - BR travel

And just for reference purposes, here is the BR combat site fit that I am carrying:

[Tengu, ham tengu ls combat (BR)]
Ballistic Control System II
Caldari Navy Ballistic Control System

Cap Recharger II
‘Copasetic’ Particle Field Acceleration
Pith C-Type Large Shield Booster
EM Ward Field II
Experimental 10MN Afterburner I
EM Ward Field II
Cap Recharger II

Heavy Assault Missile Launcher II, Mjolnir Rage Heavy Assault Missile

Medium Hydraulic Bay Thrusters I
Medium Rocket Fuel Cache Partition I
Medium Capacitor Control Circuit II

Tengu Defensive – Amplification Node
Tengu Electronics – Emergent Locus Analyzer
Tengu Offensive – Accelerated Ejection Bay
Tengu Engineering – Capacitor Regeneration Matrix
Tengu Propulsion – Gravitational Capacitor

Here is that fit in EFT.  Tengu - BR combat sides (medium skill)

Skillwise, this pilot has 5’s in Engineering fitting skills, 4’s in rigging skills, 5’s in Tengu subsystems, 4’s in Navigation, 4’s in shields and 4’s in missiles (except where 5’s are required for T2 missiles)


Sansha 6/10 Sansha War Supply Complex

The Sansha War Supply Complex is a DED rated 6/10 complex found in the low-sec regions of Derelik, Devoid, Domain, and Tash-Murkon and the null-sec regions of Stain, Paragon Soul, Esoteria, Catch, and Providence.

It is a 5 room complex with the “Overseer Skomener Effotber” serving as the final boss.  The official wiki does an ok job of laying out the ships you may encounter.  The complex takes about an hour to run depending on your fit.  There are a total of 34 battleships (4 of them faction) that must be killed with a few more that are optional.

Room 1:

1 Overseer Faction Battleship

7 Battleships

4 Cruisers

4 Frigates

Sanshas 6-10-1

Sanshas 6-10-1a

This first room is fairly easy.  There is some tracking disruption, but no other E-war.  The faction BS does somewhat higher damage, but is fairly easy to kill.  I have never seen it drop faction loot.  There are 2 gates here.  The Supply Pit is optional.  The Product Park must be done.

Room 2 (Product Park):

1 Overseer Faction Battleship

12 Battleships

6 Battlecruisers

1 Cruisers

2 Destroyers

3 Frigates

Sanshas 6-10-2

This room is mostly noteable for the number of battleships that must be killed.  Three of them start out on top of you and the rest are about 40-50km away.  I have never seen the Overseer drop faction loot.

Room 3

1 Overseer Faction Battleship

11 Battleships

7 Battlecruisers

3 Destroyers

2 Frigates

Sanshas 6-10-3

Again – lots of battleships.  If you like to loot and salvage, this is a great complex.  One of the battleships starts out around 10km, the rest are 30-50km away.  The Overseer in this room is a lot tougher.  He reps armor fairly significantly and does a lot of damage.  Armor resists are EM 60% / Explosive 75% /  Kinetic 70% / Thermal 63%.  Total Armor is 6800HP.  Armor repair is 1300 every 10 seconds.  Damage is about 470 per second (33%EM 67%Thermal) to a full-size, non-moving target.  I have seen it drop faction loot a couple of times.

Room 4

2 Missile Batteries

1 Overseer Faction Battleship

8 Battleships

11 Battlecruisers

7 Destroyers

2 Frigates

Sanshas 6-10-4

As long as you have the tank in my suggested fittings, you can head straight for the Overseer.  There is some tracking disruption, but no other E-war in this room.  The overseer likes to hang out near the large asteroid/station so you need to be careful in your approach.  I highly suggest flying manually past the asteroid and then setting a nice close orbit of 500-1000m around the Overseer.  If you aren’t careful you may get hung up on the asteroid and take more damage than you can handle.

The Overseer has a very tough tank.  Armor starts at 6800HP with very high resists against everything but EM.  Armor resist profile is EM 70% / Explosive 90% / Kinetic 85% / Thermal 85%.  In addition, he repairs 1200 HP every 8 seconds (effectively 150 armor/second).  This means you need over 1000dps if you are using Kinetic/Thermal damage (85% resists brings this down to 150dps which is also the amount repaired each second).  Using pure EM damage you need to do over 500dps.  This is one of the reasons that the Tengu with its selectable damage does so well in PVE.

Fitting:

My standard lowsec Tengu fitting works fine here.  It takes about 50 minutes or so to complete the complex and it kills the final Overseer with one or two reloads.

However, I have had to skip at least three of these complexes recently due to not having enough time to run them.  So I put together a faster fit.  This fit is expensive and not something I recommend if you have a tight budget or frequently lose ships or are aiming for any kind of killboard efficiency.  (I nearly lost this ship yesterday, but that was more due to a series of mistakes than anything else.)

[Tengu, Sansha 6/10 HAM $$$$]
Caldari Navy Ballistic Control System (100M)
Ballistic Control System II


Republic Fleet 10MN Afterburner (54M)
Pithum A-Type Medium Shield Booster (650M)
Pith C-Type EM Ward Field (55M)
Shield Boost Amplifier II
Cap Recharger II


Heavy Assault Missile Launcher II, Mjolnir Rage Heavy Assault Missile


Medium Hydraulic Bay Thrusters II (30M)
Medium Rocket Fuel Cache Partition I
Medium Capacitor Control Circuit II


Tengu Defensive – Amplification Node (52M)
Tengu Electronics – Dissolution Sequencer (22M)
Tengu Offensive – Accelerated Ejection Bay (65M)
Tengu Engineering – Augmented Capacitor Reservoir (24M)
Tengu Propulsion – Gravitational Capacitor  (11M)


So that is about 1.4 Billion ISK (counting the Tengu Hull, plus a bit more when you add in the scanning/covops subsystems) .  I think it shaves about 15-20 minutes off my completion time for the complex and it allows me to kill the Overseer without reloading.

Loot:

Bounties are about 35 million. 19th Tier Overseer’s Personal Affects (guaranteed drop) is about 52 million. You may also get True Sansha modules, Centum A-type modules, and/or an Phantasm BPC. The best drops I have received are a Centum A-Type Energized Adaptive Nano Membrane worth about 850 million and a Centum A-Type Medium Armor Repairer worth about 355 million. You can get more than one drop or you may get nothing.

Blood Annex

The Blood Raiders Blood Annex is an unrated complex found by scanning cosmic signatures in the low-sec regions of Aridia, Genesis, Kador, Khanid, Kor-Azor, and The Bleak Lands.

It is the big brother to the Blood Raiders Minor Annex and only slightly less unpopular.

Starting off, I use a variation my standard Tengu Lowsec DED complex fit.

There are probably better fits out there, but I can guarantee that this one works.


[Tengu, HAM Tengu Blood Annex – Blood Platinum Tag]


Capacitor Flux Coil II

Ballistic Control System II

Caldari Navy Ballistic Control System II

Caldari Navy Ballistic Control System II


Cap Recharger II

Pith C-Type Large Shield Booster

EM Ward Field II

Dread Guristas EM Ward Amplifier

10MN Afterburner II

Large Shield Extender II

Large Shield Extender II


Heavy Assault Missile Launcher II, Mjolnir Rage Heavy Assault Missile

Heavy Assault Missile Launcher II, Mjolnir Rage Heavy Assault Missile

Heavy Assault Missile Launcher II, Mjolnir Rage Heavy Assault Missile

Heavy Assault Missile Launcher II, Mjolnir Rage Heavy Assault Missile

Heavy Assault Missile Launcher II, Mjolnir Rage Heavy Assault Missile


Medium Capacitor Control Circuit II

Medium Hydraulic Bay Thrusters I

Medium Rocket Fuel Cache Partition I


Tengu Defensive – Amplification Node

Tengu Electronics – Emergent Locus Analyzer

Tengu Offensive – Accelerated Ejection Bay

Tengu Engineering – Capacitor Regeneration Matrix

Tengu Propulsion – Gravitational Capacitor

Room 1 – use a Blood Platinum Tag and skip this room!  They are only about 1million isk or so and they save you a ton of time.  Buy a handful next time you are in a hub.  Otherwise you face being neuted twice.

6 Missile Batteries

3 Battleships

1 Cruiser

2 Stasis Webs (stasis web on warp-in)

1 Blood Raider Chapel (destruction unlocks gate – or use a Blood Platinum Tag)

– shooting the Blood Raider Chapel triggers another wave:

6 Battleships (3x Archbishops neut)

2 Cruisers

2 Elite Frigates (web, warp scramble)

Room 2:

The first 5 minutes of this room are the toughest.  On warp-in, you are faced with the following:

Blood Annex Room2a

6 Battleships, 3 Destroyers, 3 Frigates, 2 Missile Batteries, and 2 Stasis Towers.

Also, there are 4 EM Forcefields that must be destroyed first or they will almost immediately repair anything else you damage.  They are 18-35km (varies) away.

Blood Annex Room2b

Basically, your are webbed and neuted by 3 battleships at warp-in.  The battleships neut somewhat sporadically and with the fit above I usually don’t get neuted out completely as long as I don’t run the shield booster.  The 2 Large Shield Extenders give you the buffer and the active/passive EM shield hardeners give you about 70-75% EM resistance.

The EM forcefields must be killed first.  They have no resistances so using Scourge missiles is best.  I usually warp-in with Javelins loaded.  I destroy any forecields that are outside of my Rage range and then reload to Rage to finish off the rest.  It is worth losing 10 seconds of reload to use the higher damage missiles.  After that, either the stasis web towers (if you don’t have to reload) or the neuting battleships (switch to Mjolnir Rage missiles) are next.

Once the neuting battleships are down, I can safely run my shield booster and tank the rest of the damage.  Occasionally you will get web/scram frigate that needs to be killed.  Sending a volley at the Blood Raider Battlestation spawns the Overseer wave.

Blood Annex Room 2c

The Overseer (Corpus Station Manager) is fairly easy to kill and has a chance to drop Dark Blood loot.  Killing him may also spawn the escalation Blood Raiders Powergrid.  If you don’t get an escalation message, try destroying the Blood Raider Battlestation – it is the alternate trigger for the escalation.  It has a 175,000 HP (25k / 50k / 100k) with no resistances.

The complex can be run in 15-25 minutes and it is usually worth doing.

Tengu Fit: Lowsec DED Complexes

I previously posted a fit for a HAM Tengu for Blood Raiders sites and it is one of my most viewed posts.  I was originally going to do a fit for each faction, but since you can use almost the same fit for all of them, it seemed to make more sense to combine them all in one post.  This fit works for all DED 5/10 and 6/10 complexes in lowsec.  It works for the unrated complexes too, but sometimes additional modifications are required (generally to add a shield buffer or a web).

[Tengu, HAM Tengu complex 5-6 ]

Ballistic Control System II

Ballistic Control System II

Caldari Navy Ballistic Control System

Caldari Navy Ballistic Control System


Cap Recharger II

Cap Recharger II

10MN Afterburner II

Shield Boost Amplifier II

Pith C-Type Large Shield Booster

[empty med slot]**

[empty med slot]**


Heavy Assault Missile Launcher II, Scourge Rage Heavy Assault Missile

Heavy Assault Missile Launcher II, Scourge Rage Heavy Assault Missile

Heavy Assault Missile Launcher II, Scourge Rage Heavy Assault Missile

Heavy Assault Missile Launcher II, Scourge Rage Heavy Assault Missile

Heavy Assault Missile Launcher II, Scourge Rage Heavy Assault Missile


Medium Capacitor Control Circuit II

Medium Hydraulic Bay Thrusters I

Medium Rocket Fuel Cache Partition I


Tengu Defensive – Amplification Node

Tengu Electronics – Emergent Locus Analyzer

Tengu Offensive – Accelerated Ejection Bay

Tengu Engineering – Capacitor Regeneration Matrix

Tengu Propulsion – Gravitational Capacitor

**The empty mid slots are all that need to change from faction to faction.

For Blood Raiders and Sansha’s, use two EM Ward Field II’s.  Use Mjolnir missiles instead of Scourge.

For Angels, use an Explosive Deflection Field II and an Adaptive Invulnerability Field II

For Guristas, use an Adaptive Invulnerability Field II and a Conjunctive Gravimetric ECCM Scanning Array (to help with jamming resistance)

For Serpentis, use and Adaptive Invulnerability Field II and a Sensor Booster II (to help with sensor damp resistance)

For Angels, Guristas, and Serpentis, you tank about 900dps and deal about 750dps (34km range) / 500dps (62km) using Scourge Rage and Scourge Javelins respectively.

For Bloods and Sanshas you tank just shy of 900dps and deal about 610dps (34km range) / 400dps (62km) using Mjolnir Rage and Mjolnir Javelins respectively.  Due to resists, you deal more effective damage using Mjolnir than you do with Scourge.

You can downgrade the faction ballistics controls to save isk, but you will need to use faction or meta modules or implants to make up the additonal CPU.  If your capacitor skills are lacking, you can drop a Ballistic Control for a Capacitor Flux Coil.

If you are nervous about running a complex for the first time and want even MORE tank, you can drop a Ballistic Control and add a Damage Control II.  You will lose about 30dps in damage and gain about 100-150dps in tank.  Want to really, really tank it?  You can get up to a 1300dps tank by dropping a second Ballistic Control and replacing it with a Capacitor Flux Coil II.  Then drop a Cap Recharger II and replace it with a second Shield Boost Amplifer (for Guristas/Serpentis you can use a Kinetic Deflection Field for even more tank, but it isn’t cap stable without perfect skills).  This is way overkill, but you can do it the first time and then drop your tank down gradually as you get more comfortable.


Blood Raiders Minor Annex

The Blood Raiders Minor Annex is an unrated complex found in the low-sec regions of Aridia, Genesis, Kador, Khanid, Kor-Azor, and The Bleak Lands.

It is probably one of the least popular complexes in lowsec.  If you search for fits or tips on it you will get answers like: “remember when your ship had capacitor?” or “remember when your ship could move?”  If you like a little excitement in your PVE, then this complex is for you!  Neuting, webbing, warp scrambling, and tracking disruption are all featured.  Make a mistake in this complex and you will be flying home in your pod.  After all that, the reward for completion is usually some Blood Raider ammo and possibly multiple escalations before maybe providing Corpum A-type loot.  There are certainly easier ways to make isk.

Having said that, I rather enjoy this complex.  It is certainly engaging and it doesn’t take all that long to run.  It is a fight that happens in stages and each stage requires something a little different.  I am showing the fit that I use.  It is perhaps a little unusual so I will show the fit first and then attempt to justify it.  There are probably better fits out there, but I can guarantee that this one works.

[Tengu, HAM Tengu Blood Minor Annex – Blood Crystal Tag] 

Capacitor Flux Coil II

Ballistic Control System II

Ballistic Control System II

Ballistic Control System II


Large Shield Extender II

Cap Recharger II

Pith C-Type Large Shield Booster

EM Ward Field II

Dread Guristas EM Ward Amplifier

10MN Afterburner II

Fleeting Propulsion Inhibitor I


Heavy Assault Missile Launcher II, Mjolnir Rage Heavy Assault Missile

Heavy Assault Missile Launcher II, Mjolnir Rage Heavy Assault Missile

Heavy Assault Missile Launcher II, Mjolnir Rage Heavy Assault Missile

Heavy Assault Missile Launcher II, Mjolnir Rage Heavy Assault Missile

Heavy Assault Missile Launcher II, Mjolnir Rage Heavy Assault Missile


Medium Capacitor Control Circuit II

Medium Hydraulic Bay Thrusters I

Medium Rocket Fuel Cache Partition I


Tengu Defensive – Amplification Node

Tengu Electronics – Emergent Locus Analyzer

Tengu Offensive – Accelerated Ejection Bay

Tengu Engineering – Capacitor Regeneration Matrix

Tengu Propulsion – Gravitational Capacitor

First off, the rigs and subsystems are what I am already carrying with me from this fit.  Actually this whole fit is really just a modification of my base fit to deal with the various stages of the complex.

(For a full description of the ships in each room, look at the official wiki.  It does a pretty decent job).

Room 1 – use a Blood Crystal Tag and skip this room!  Seriously.  They are only about 1million isk or so and they save you a ton of time.  Buy a handful next time you are in a hub.  If you are an absolute glutton for punishment, know that this room includes multiple waves of webbing drones combined with neuting cruisers (from 40km) along with 12 battleships.  The webbing drone is the trigger for the next wave so kill it last.  Having a stasis web (preferred) or target painter is almost required for killing the drones.

Room 2:

Stage 1 (passive tank, neut resistance):  Upon warp-in, you will be webbed by 2 stasis towers, 1 drone (trigger for next wave), and 2 elite frigates.  The 2 elite frigates will also warp scramble you.  You will also be neuted immediately by 3 elite cruisers about 30km out.  Killing the cruisers is your first priority.  Using the fit above, you are remarkable resilient to neuting as long as you are not running your shield booster.  I run just the shield hardener and let my buffer soak the damage.  I usually kill the 3 cruisers at 50% shields.  After all 3 cruisers are dead, you can safely run the booster as soon as you get back above 30% capacitor.  Usually, I am above 50% capacitor when they die.

Next, web and kill the scrambling frigates – just in case you need to make an exit.

Stage 2 (clear the webs):  Now you are at crossroads, you can start clearing off the cruisers and battleships or you can try to blitz it.  I usually blitz it.  To do this, kill the stasis towers and then web and kill the drone.  This will trigger the next wave including another web drone.  I immediately web and kill this drone as well triggering the last wave.  (If you opted for a passive tank and no afterburner, then just stay put and kill off the highest dps ships and kill the drone last).

Stage 3 (run & gun): I then activate my afterburner and start kiting. Once moving, my hardeners and cap stable booster easily cover all the incoming damage.  Send 1 volley at the Blood Raider Cathedral to trigger the Cathedral wave.  Kill the Corpus Militant Supervisor (may trigger escalation, may trigger Commander)

If you get a Commander (Dark Blood Seer battlecruiser) he will come with 4 elite frigates that can web and warp scramble.  I recommend killing them first.  Then kill the Commander (may trigger escalation and drop Dark Blood loot).

If you don’t get the escalation, you can destory the Blood Raider Cathedral.  It is also a possible trigger.

Loot: Bounties are 8-15 million isk.  If you get a Commander, he may drop Dark Blood loot.  The best loot is worth about 80 million isk.  You also may get an escalation.  Each escalation site has the chance to drop Dark Blood loot.  The final escalation will be in null sec and may drop Corpum A-type loot (best drop is worth about 900 million isk).

This site has only escalated all the way for me one time and I didn’t take very good notes.  If I get the chance to run it again and it escalates, I will post the results.  I would love it if someone could provide more details from their experiences.